Hi everyone!
If you’ve been following my Artist Residency blog over the past few months you know that my residency officially ended last Thurs, Feb 28. I have cleared out my drawers, brought home all my leftover supplies, and sadly, handed in my keys.
But before I did that, I was fortunate to have a little time to experiment with some sample papers gifted to me by my friend Bill, and make more prints using my aging sensitizer and existing negatives. The results were pretty good!
The first paper I experimented with was Hahnemühle rag, which I have been looking forward to trying for over a year. It is renowned as a ‘perfect paper’ for hand-coating processes. The very-smooth surface is similar to the Stonehenge printmakers paper I used while learning the kallitype process.
To coat the Hahnemühle, I decided to use a little more sensitizer (more drops) and let it sit on the surface and soak in, rather than my ‘usual’ vigorous brushing technique where I really work the chemistry into the paper fibers. I had been doing the latter with the Fabriano watercolor paper I used for my exhibit, but for the smoother papers, this technique seems to negatively impact the surface, and results in a less-sharp print and often times, a lot of visible brush strokes.

Hahnemuhle rag paper in the developer – the tones were slightly warm and very dark
Funny enough, after printing with it and comparing it to the other papers, turns out it is my least fave. This is primarily due to how flat it looks when dry, though the resulting tones are actually pretty nice.
The next two that I tried were different Awagami washi papers – Gampi and Mitsumata. These were actually pretty weird to work with. While dry, they have a ‘right side’ and a ‘wrong side’ and when wet, they are slippery and easily crumple up on themselves. In the developer and other baths, they either became translucent or partly translucent, and they were so thin that picking them up and letting them drip to transfer to the next bath was tricky – they kept slipping out of my tongs.

The Mitsumata paper turned translucent in the developer!
But they dried down nicely with interesting surface textures – the Gampi was shimmery and almost metallic:

Shimmery finish on the Gampi paper
And the Mitsumata dried as solid white but with a slight see-through look. The dried-down tones were also warmer which was a surprise, despite having used the same chemistry and the same exposure time. I had 5 sheets of each and used them all.
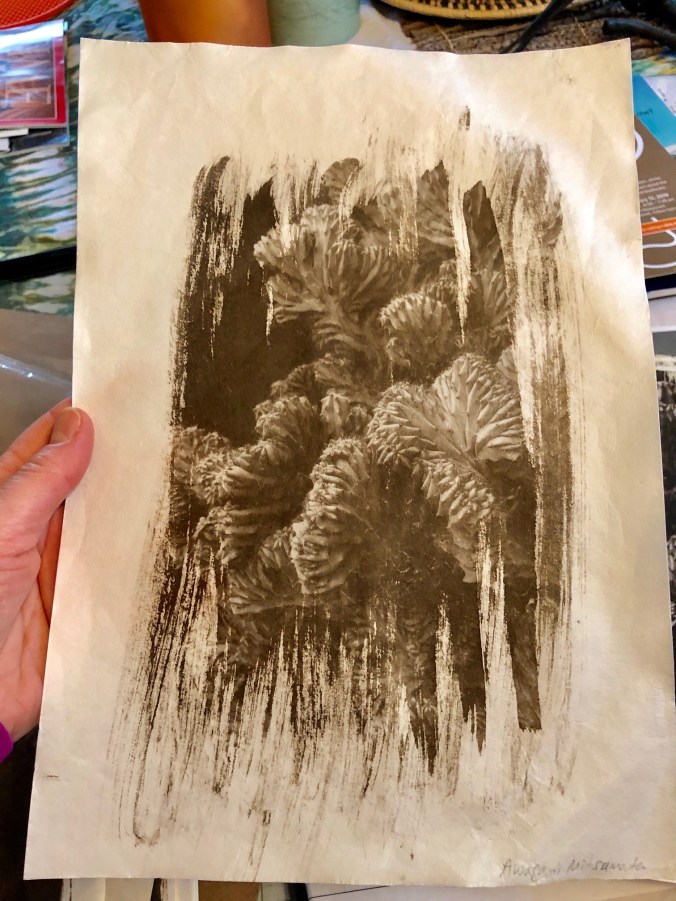
Mitsumata paper dried down, slightly warmer tone, but solid white
The last paper I tried was Arches Platine. This one was amazing! The prints had very dark, rich blacks, very cool grays and were just gorgeous. It almost made me wish I had done more paper experimentation during my residency! I used all 10 sheets of the sample pack and made new prints of some of my favorite negatives, with excellent results. This is a paper I would definitely buy again!
My next goal is to make more new negatives of different images and get back into the darkroom later this spring. For now though, I am taking a break from the Darkroom, hoping there is still some winter left, and looking forward to more xc skiing before spring is truly here!
